Dungeons and Dragons Gaming Table
It’s been a while since I’ve posted something.
This post is about one of my other passions: Dungeons & Dragons.
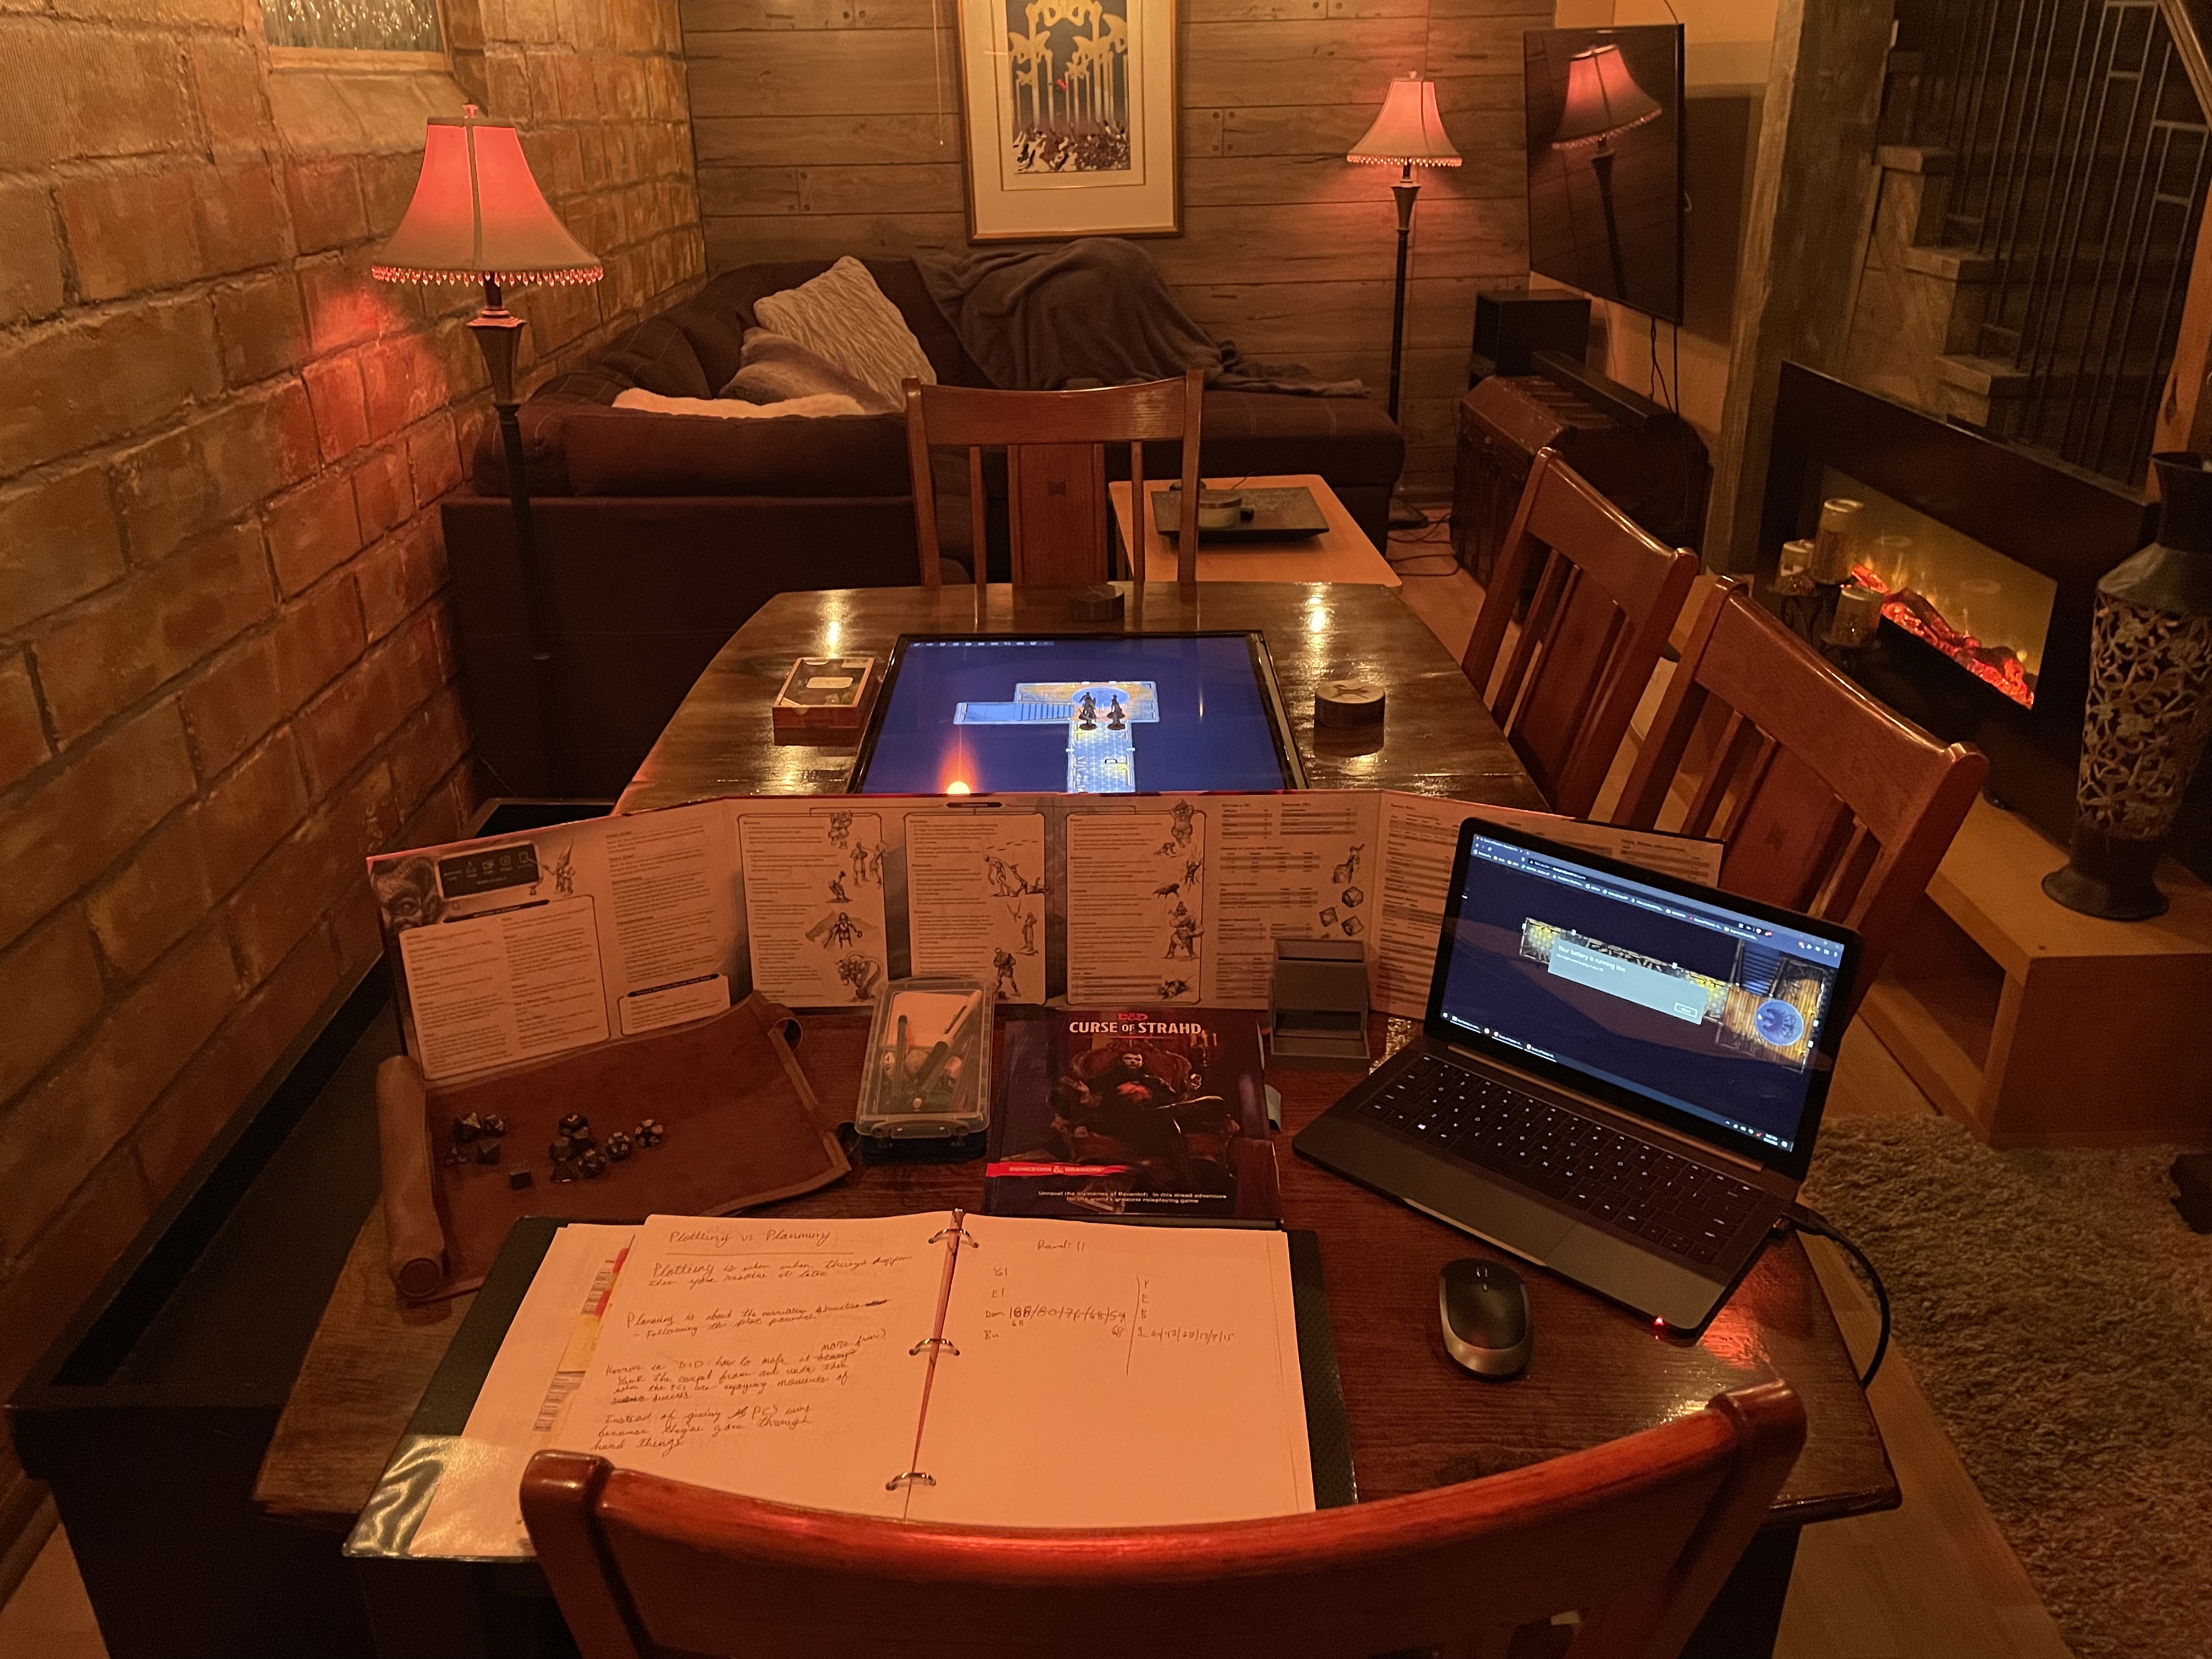
I’m the Dungeon Master for a Curse of Strahd campaign I’ve been running for some friends. We’ve been going for almost a year now, with 20 sessions completed to date. The campaign started online on April 22, 2021. Since then, we’ve transitioned to in-person play—but one aspect of the online game that I really loved was the battle maps.
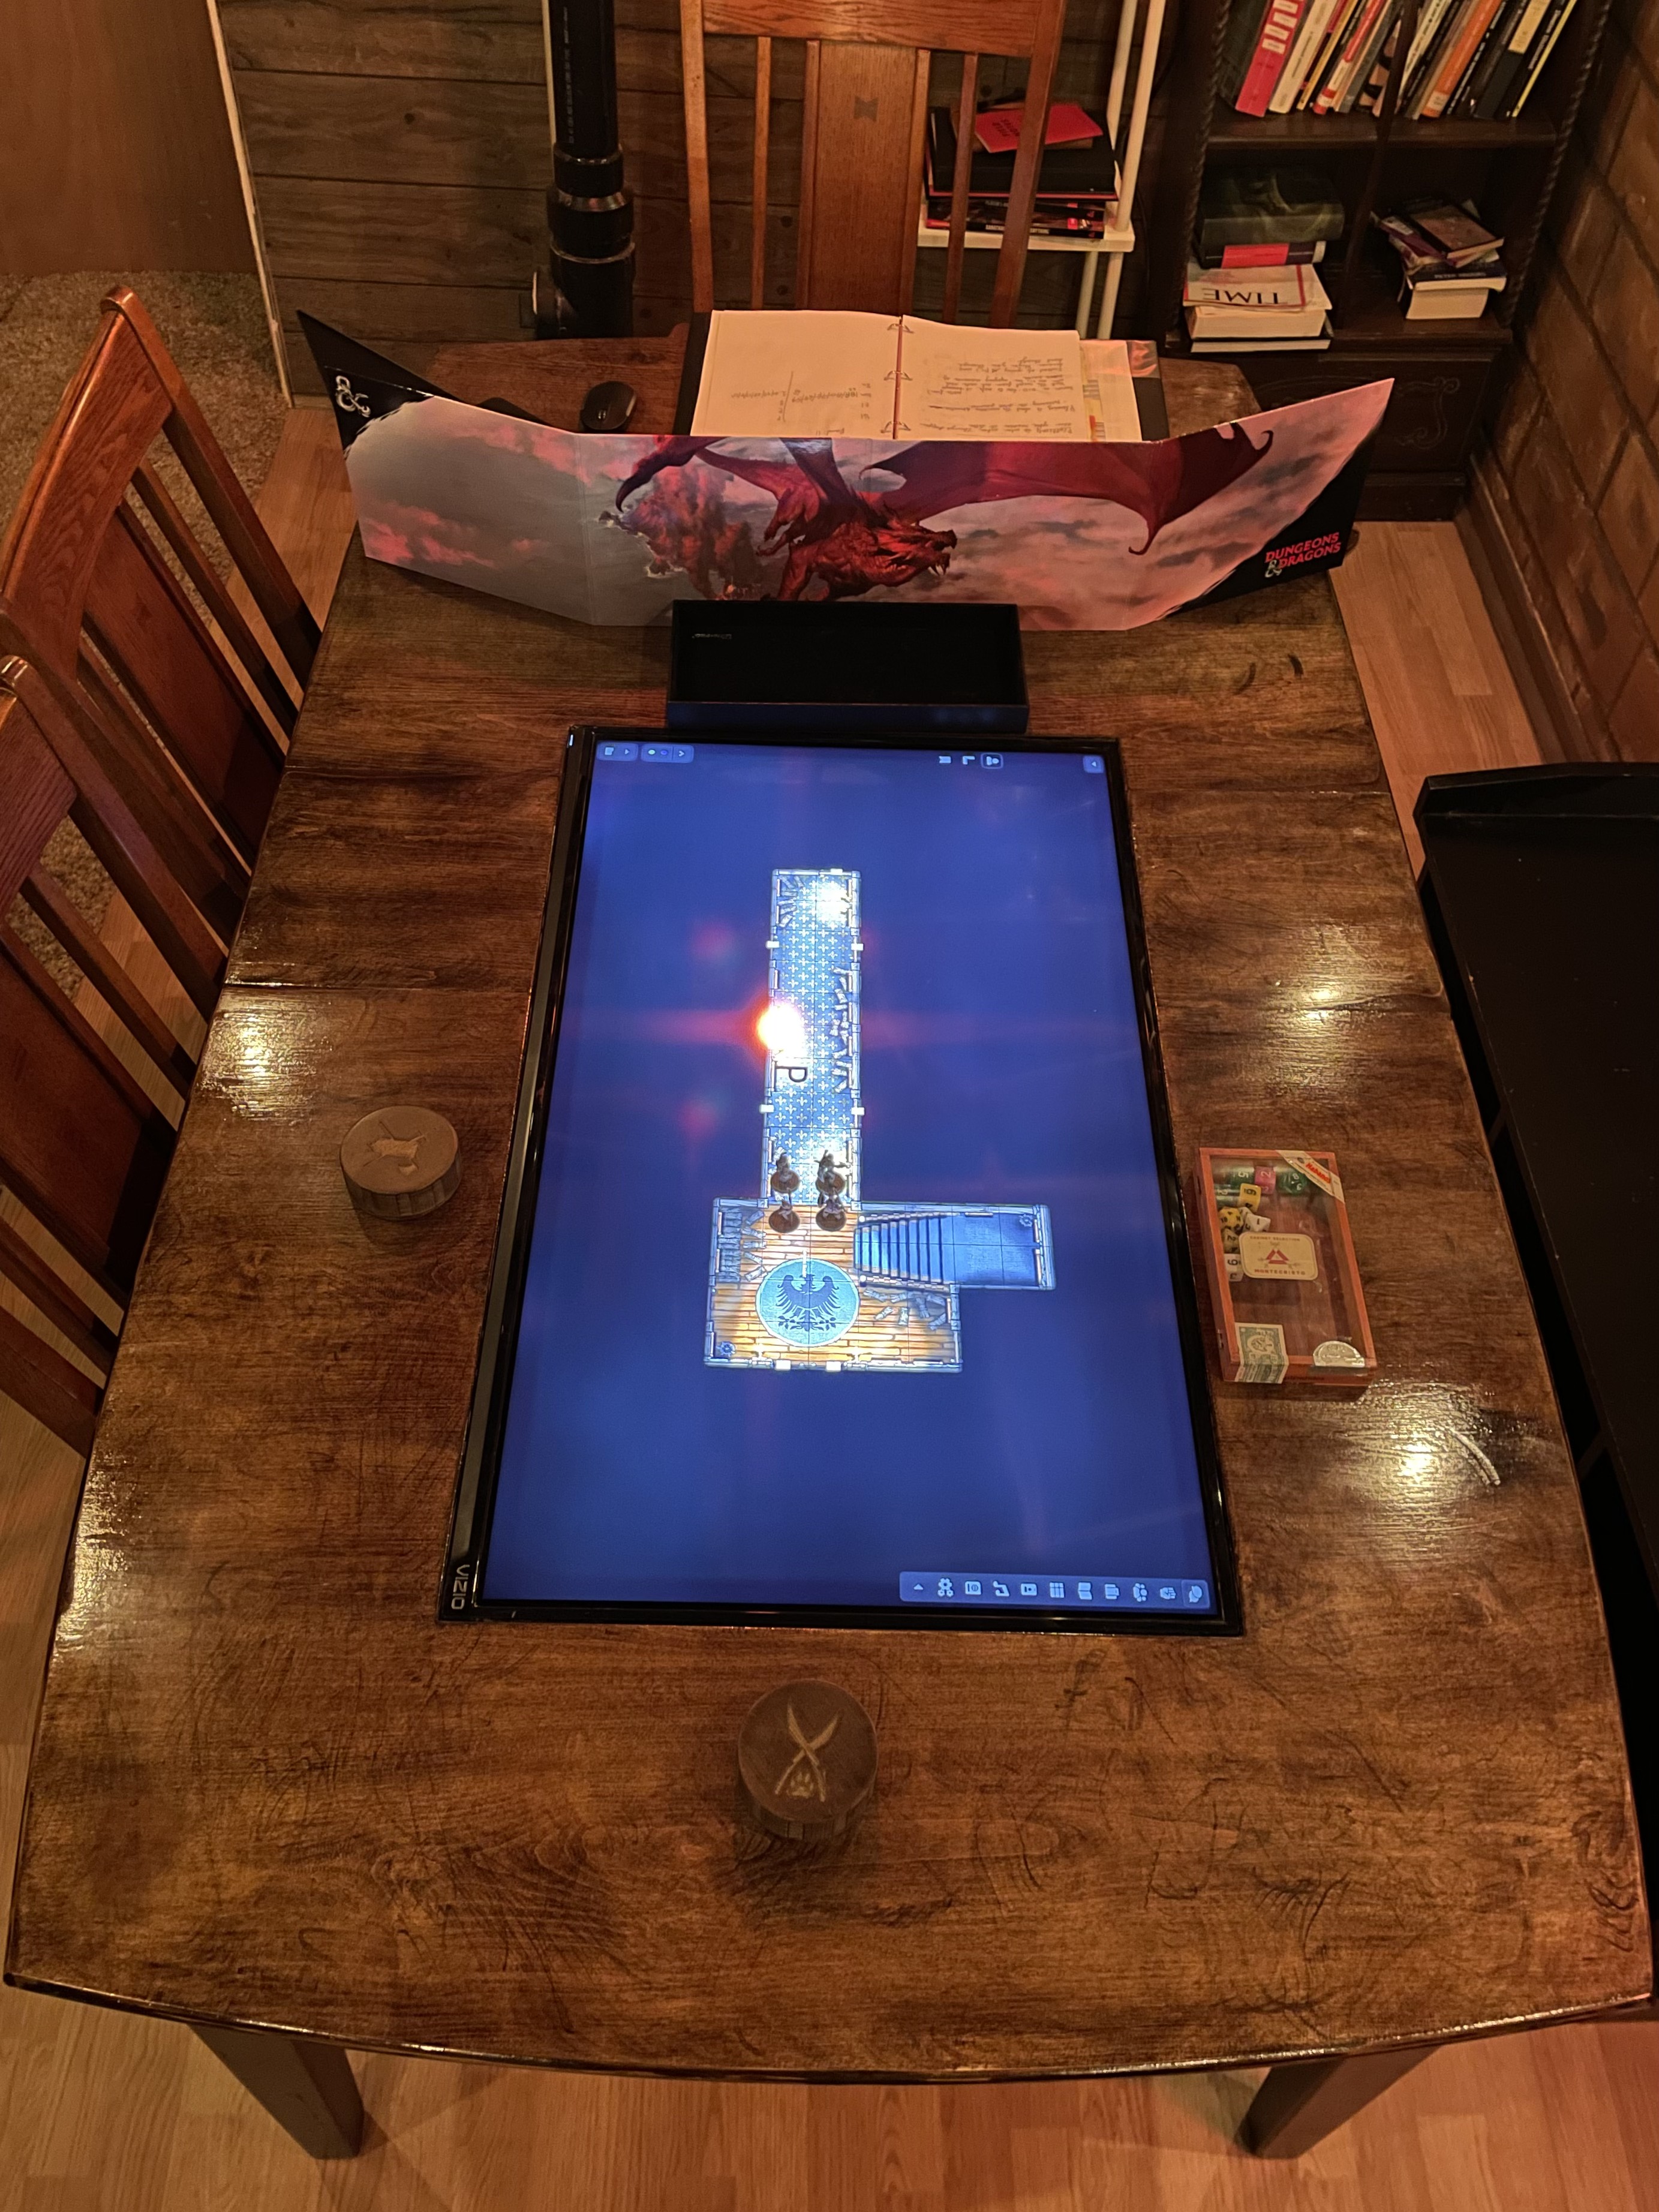
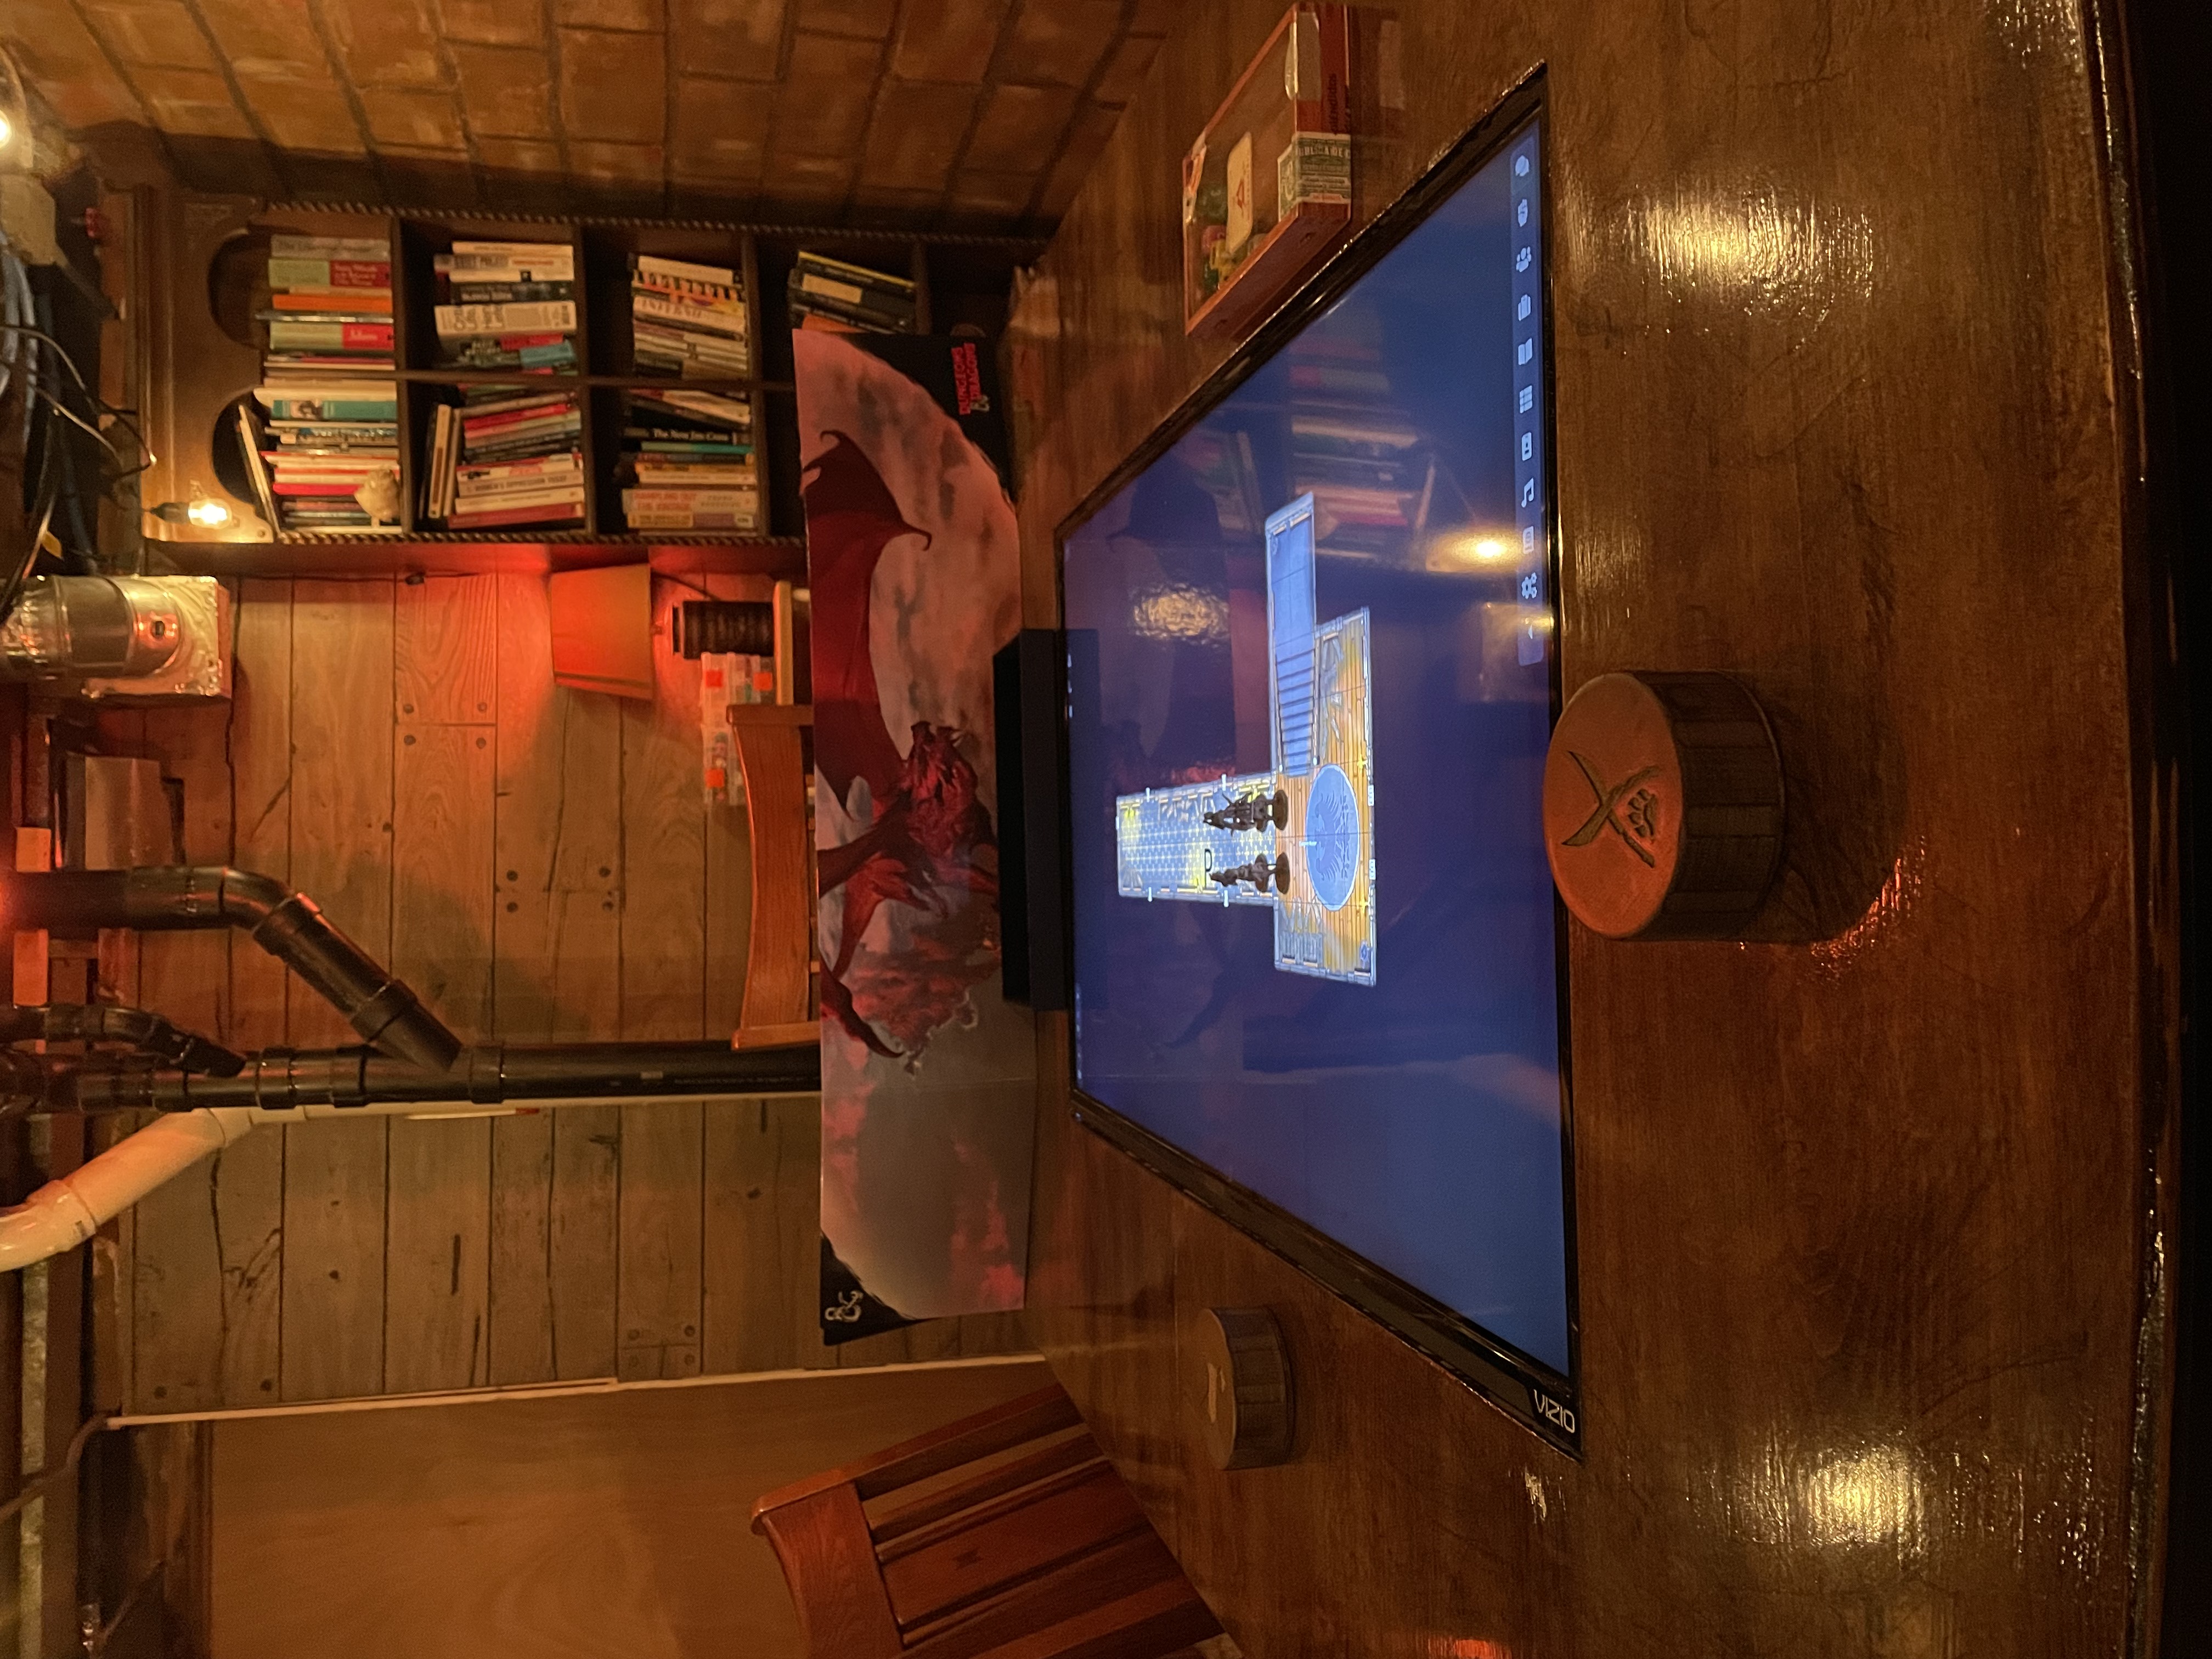
Using FoundryVTT, I was able to show my players images, maps, and handouts. I could also change music with the click of a button. The ease of use made the application invaluable to me. So, I kept using FoundryVTT for our in-person games by displaying the application on a TV as our battle mat.
That setup became our norm for in-person play for most of the campaign. However, it was a hassle—I had to set up and break down everything before and after each session. So I’d been planning to build a more permanent solution for several months.
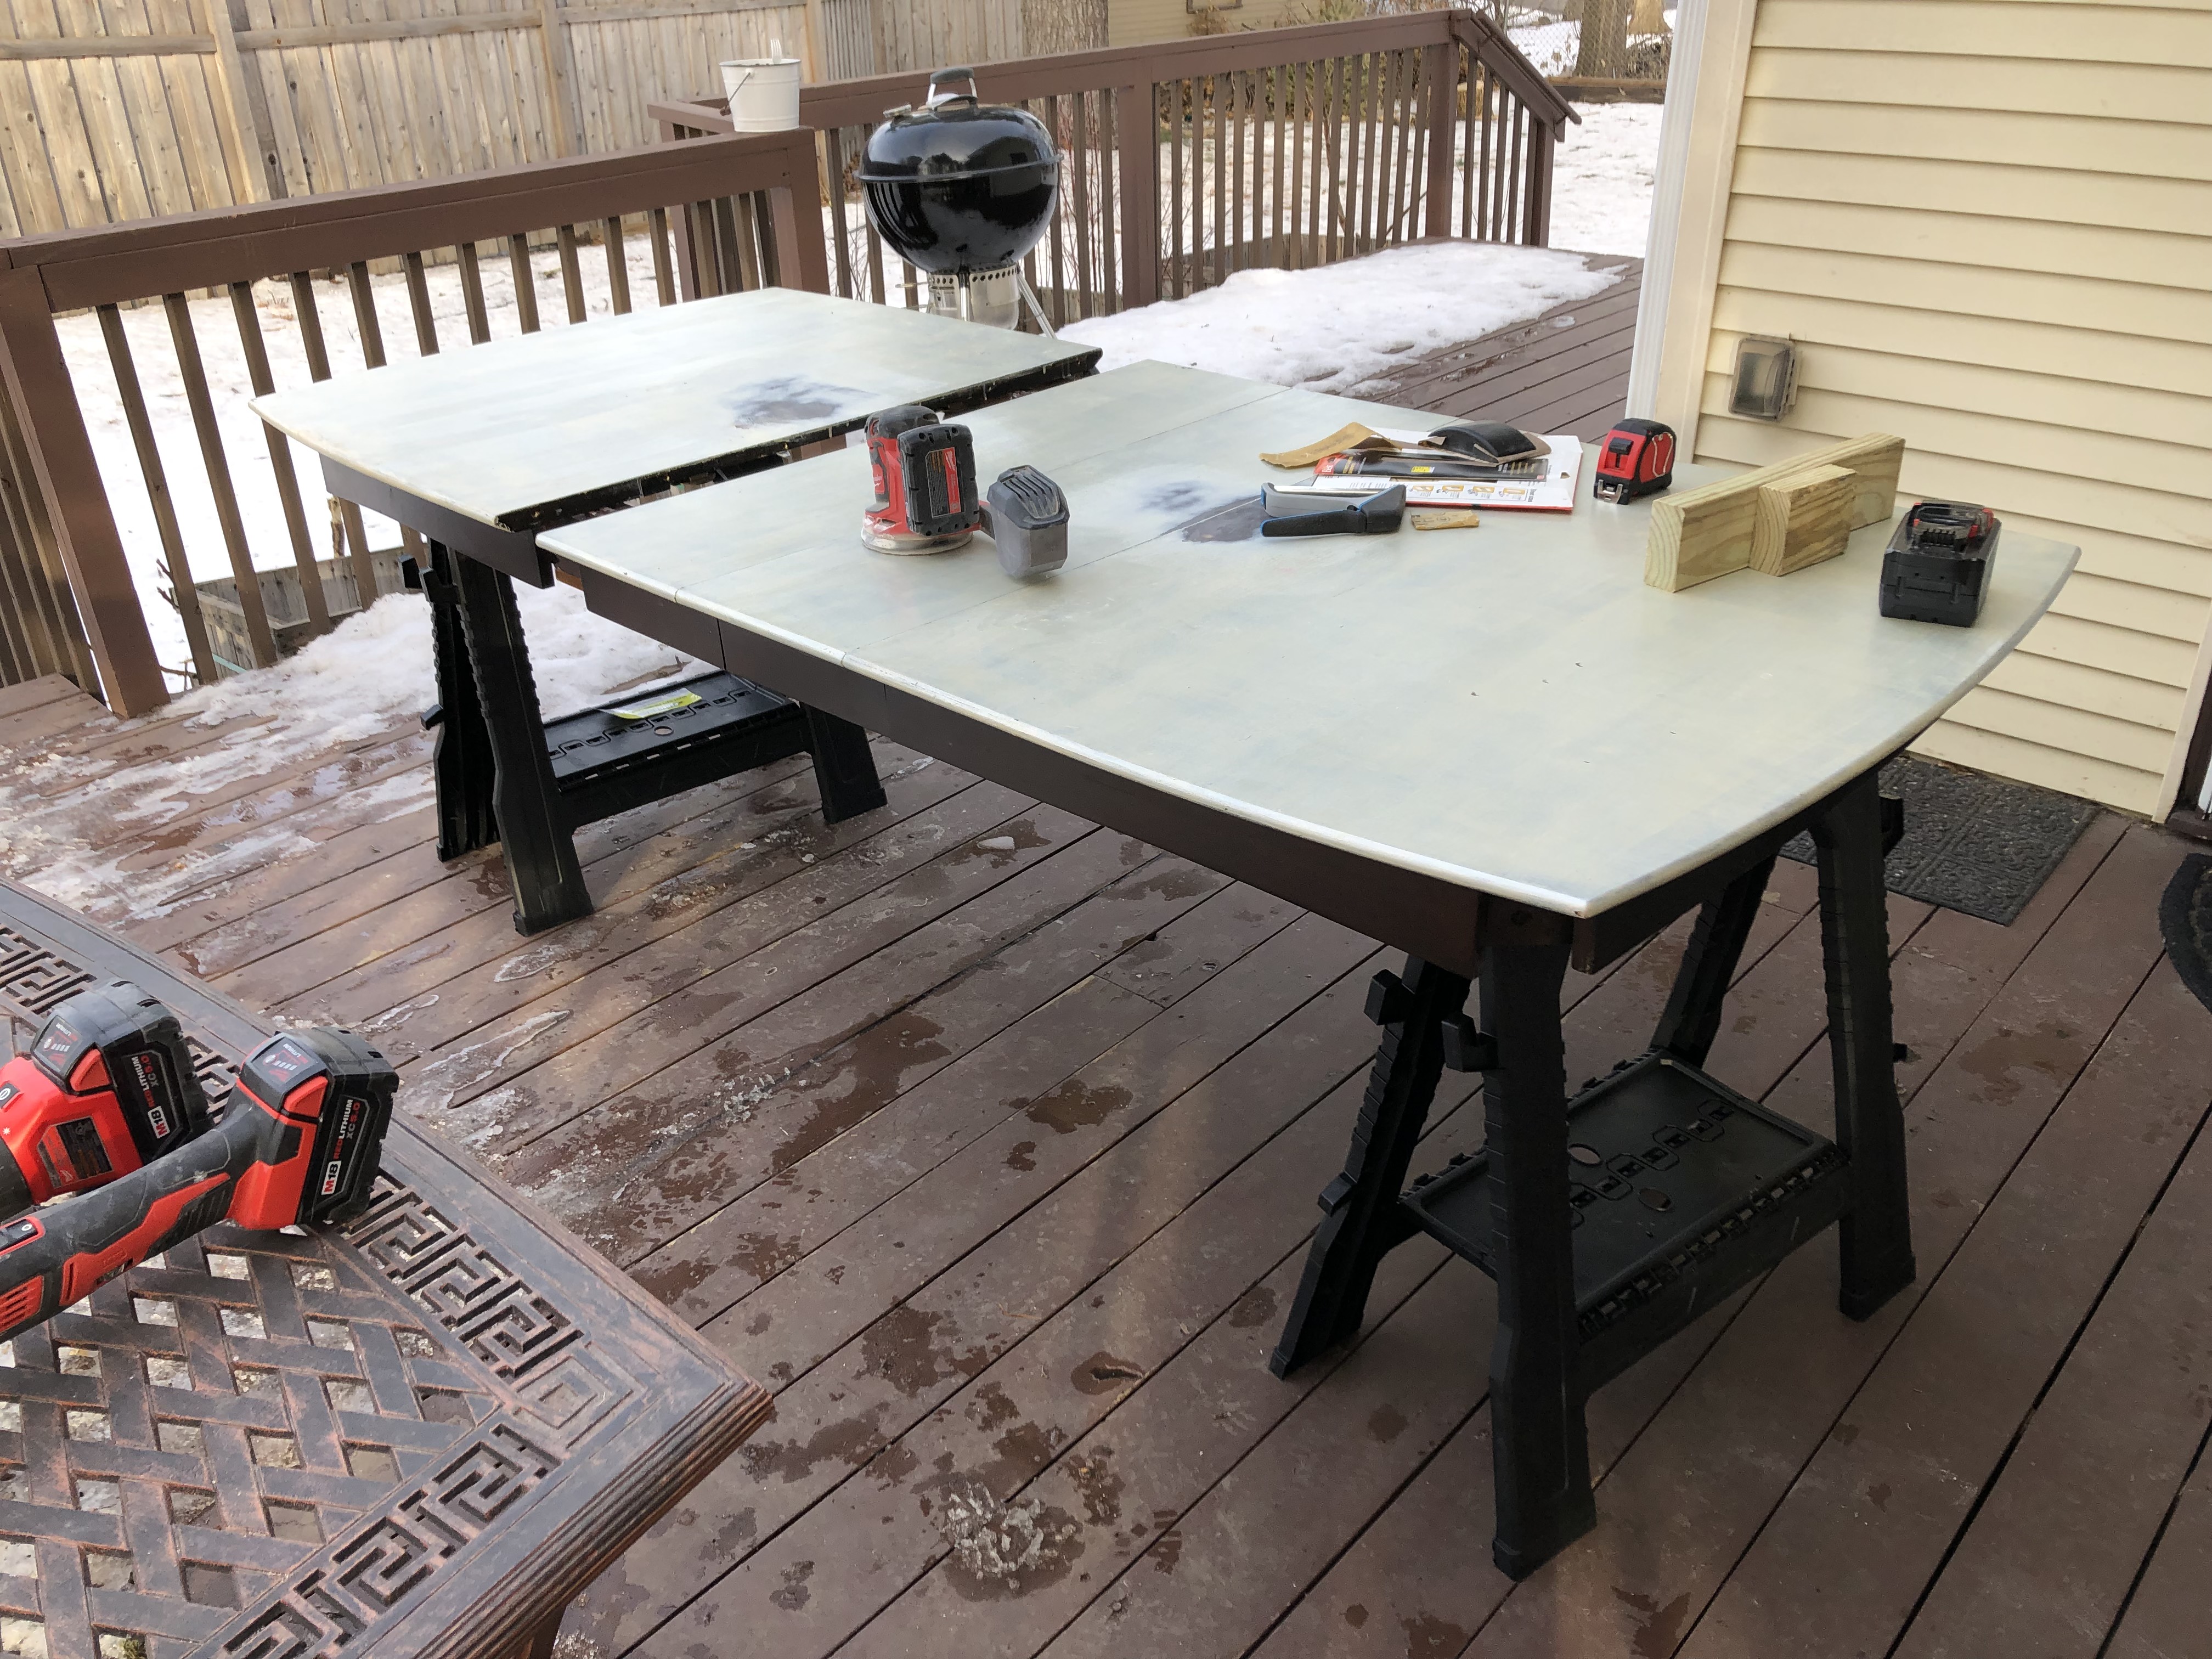
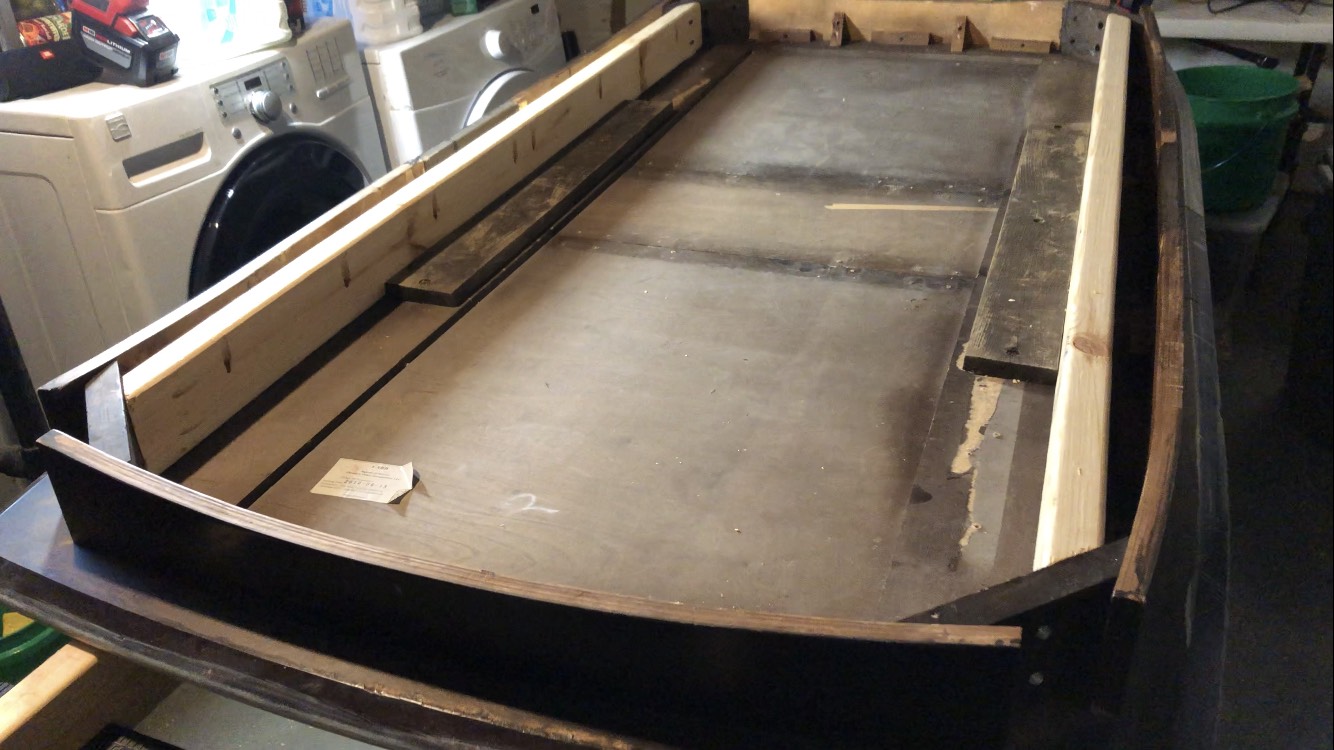
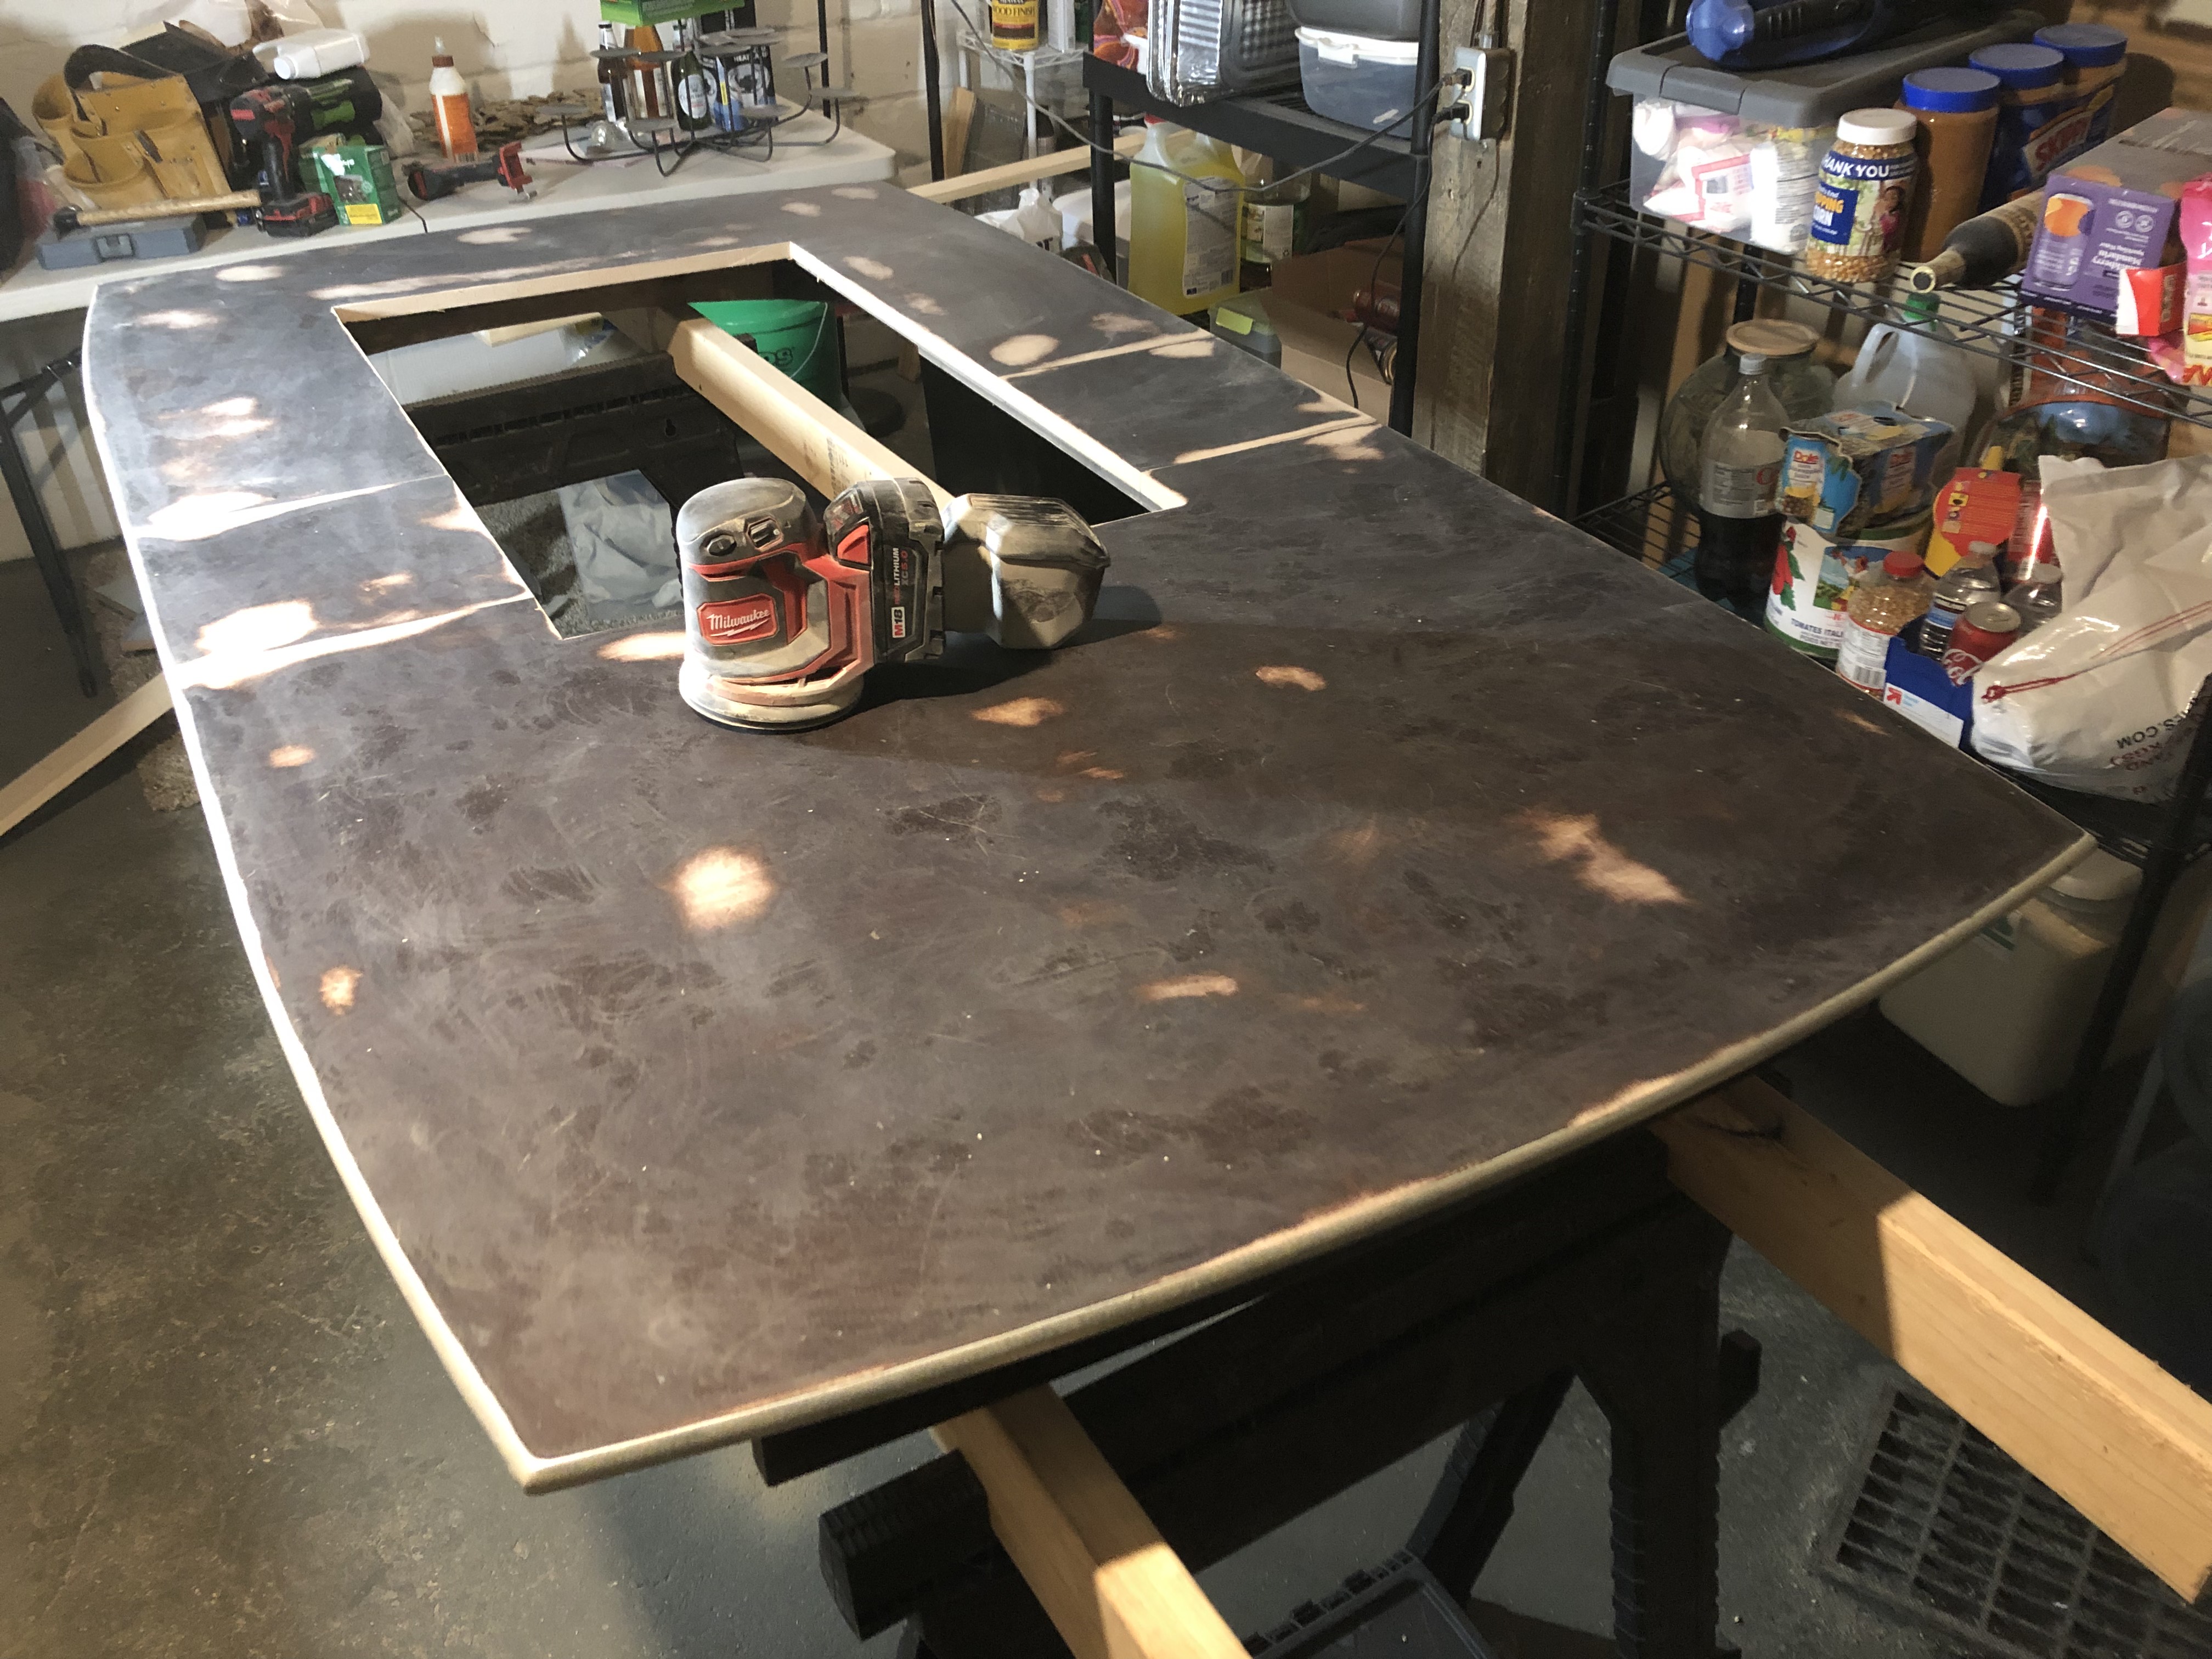
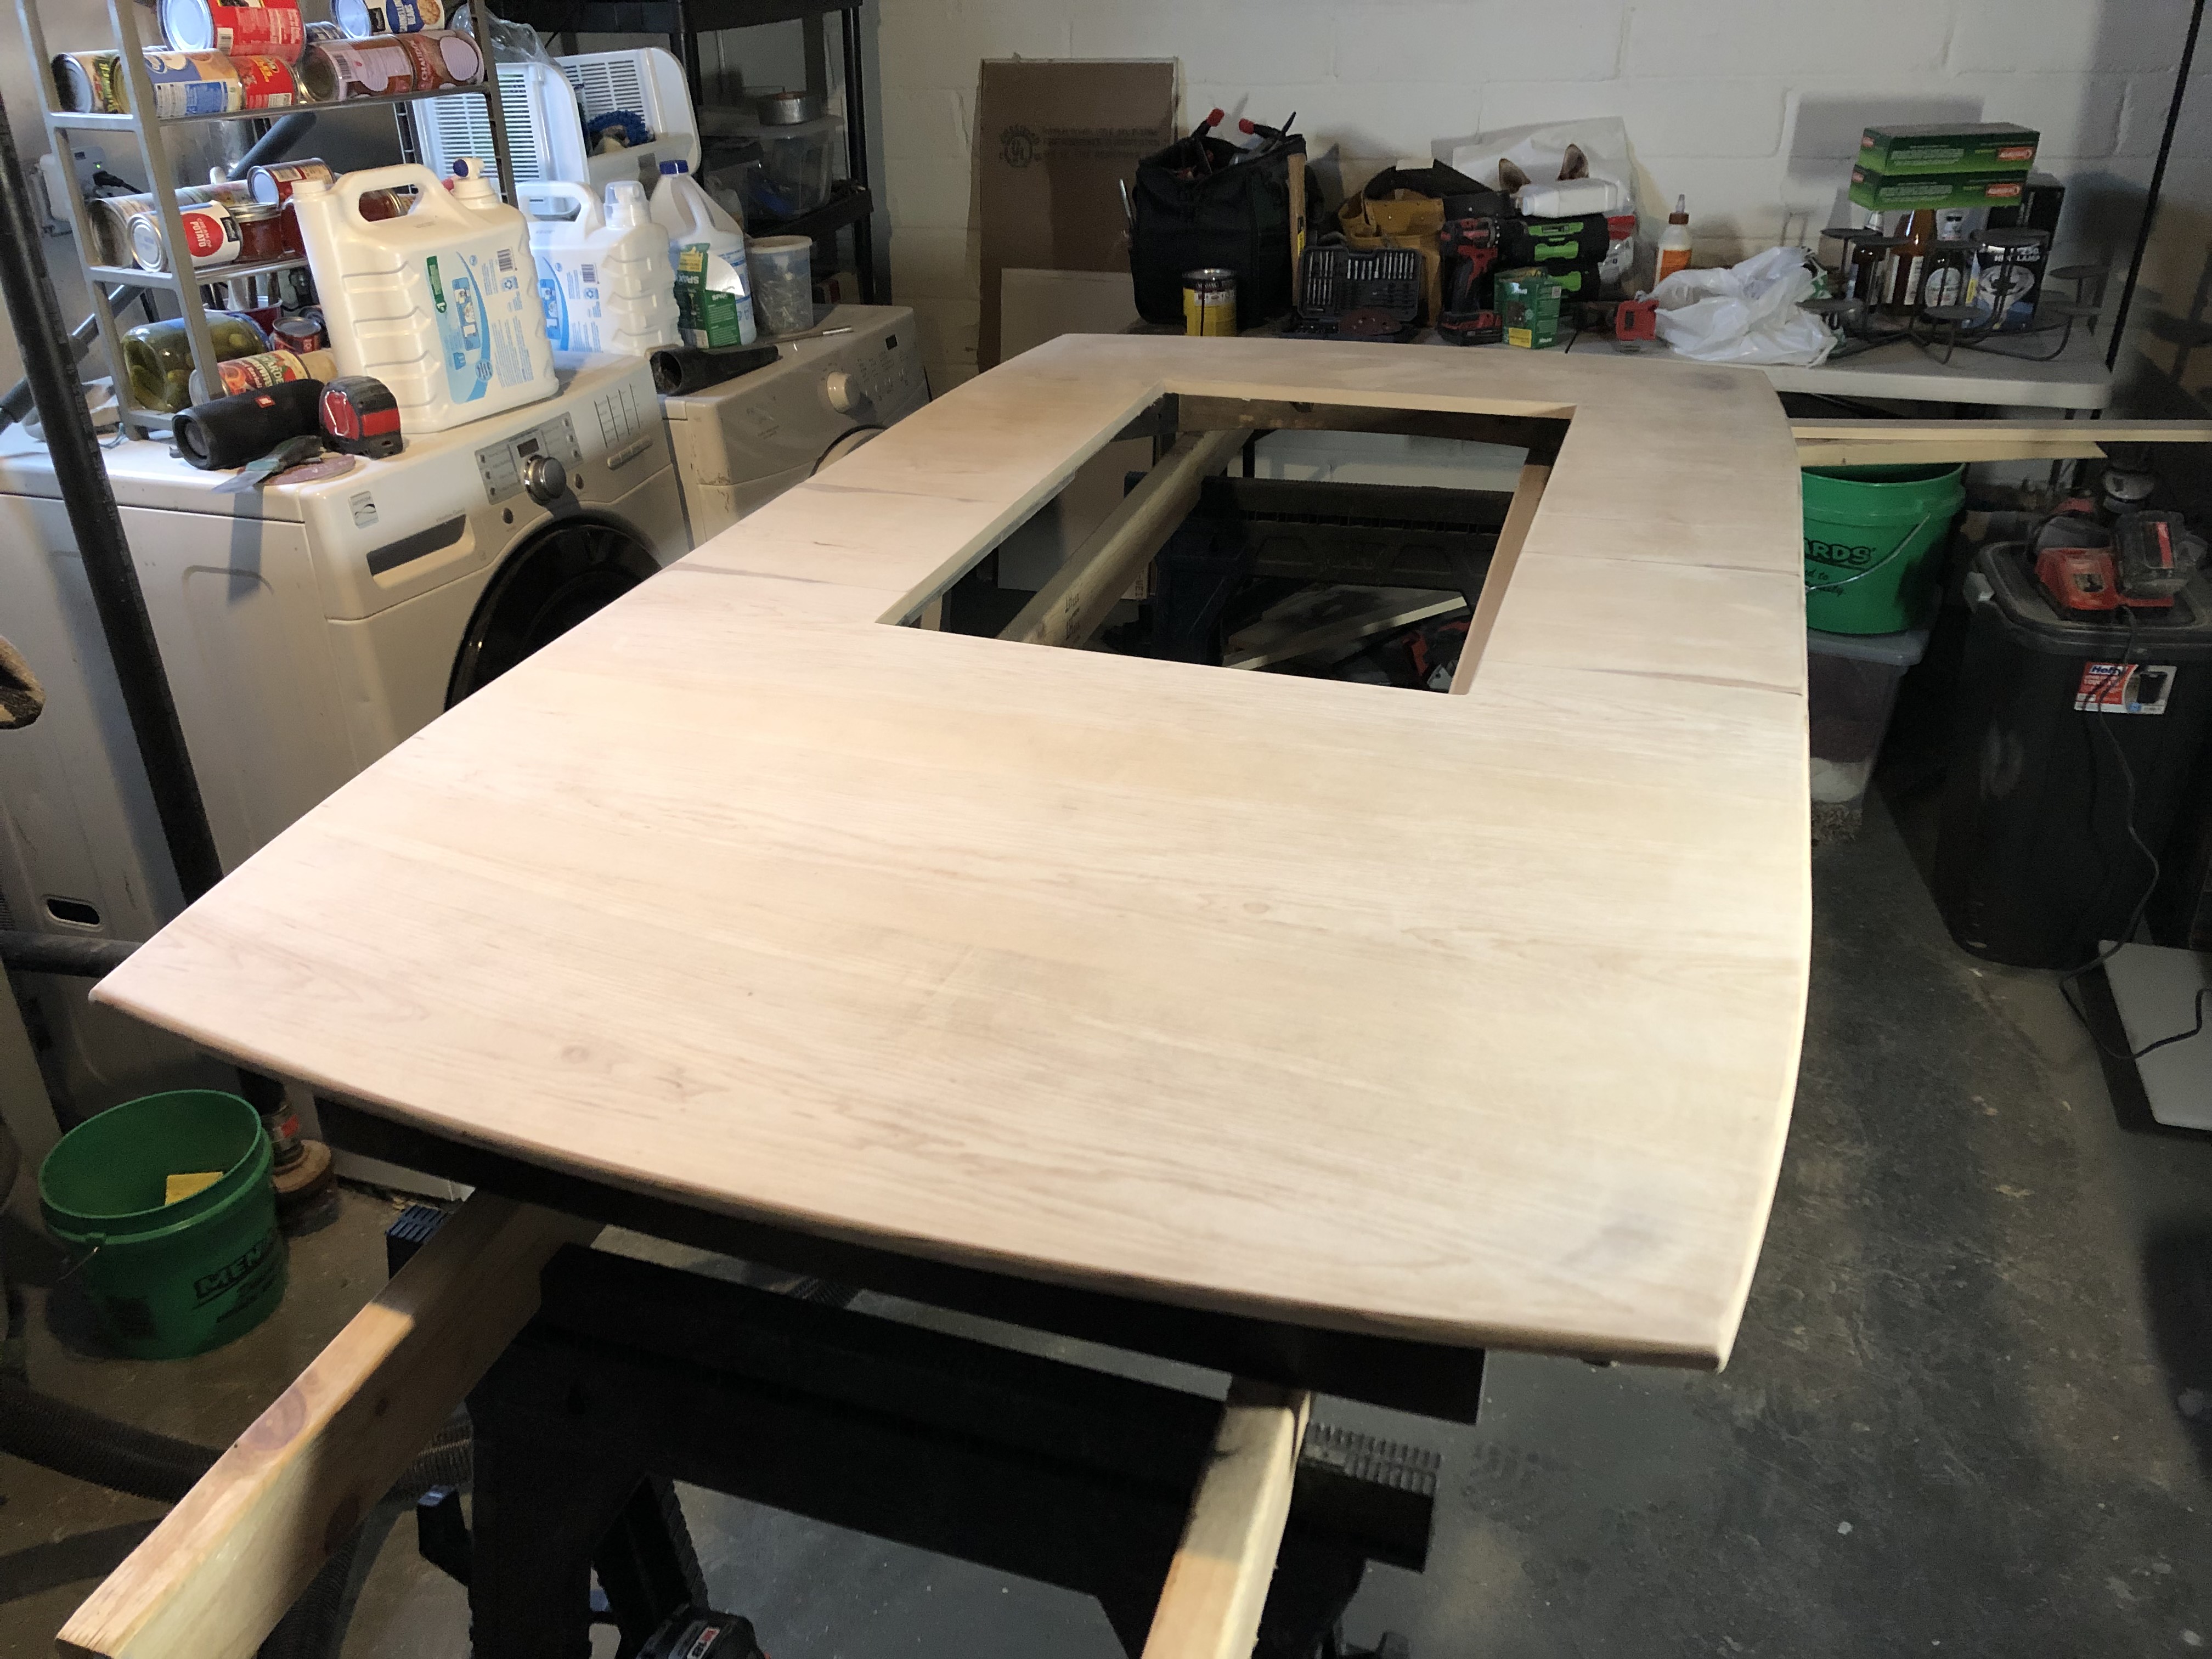
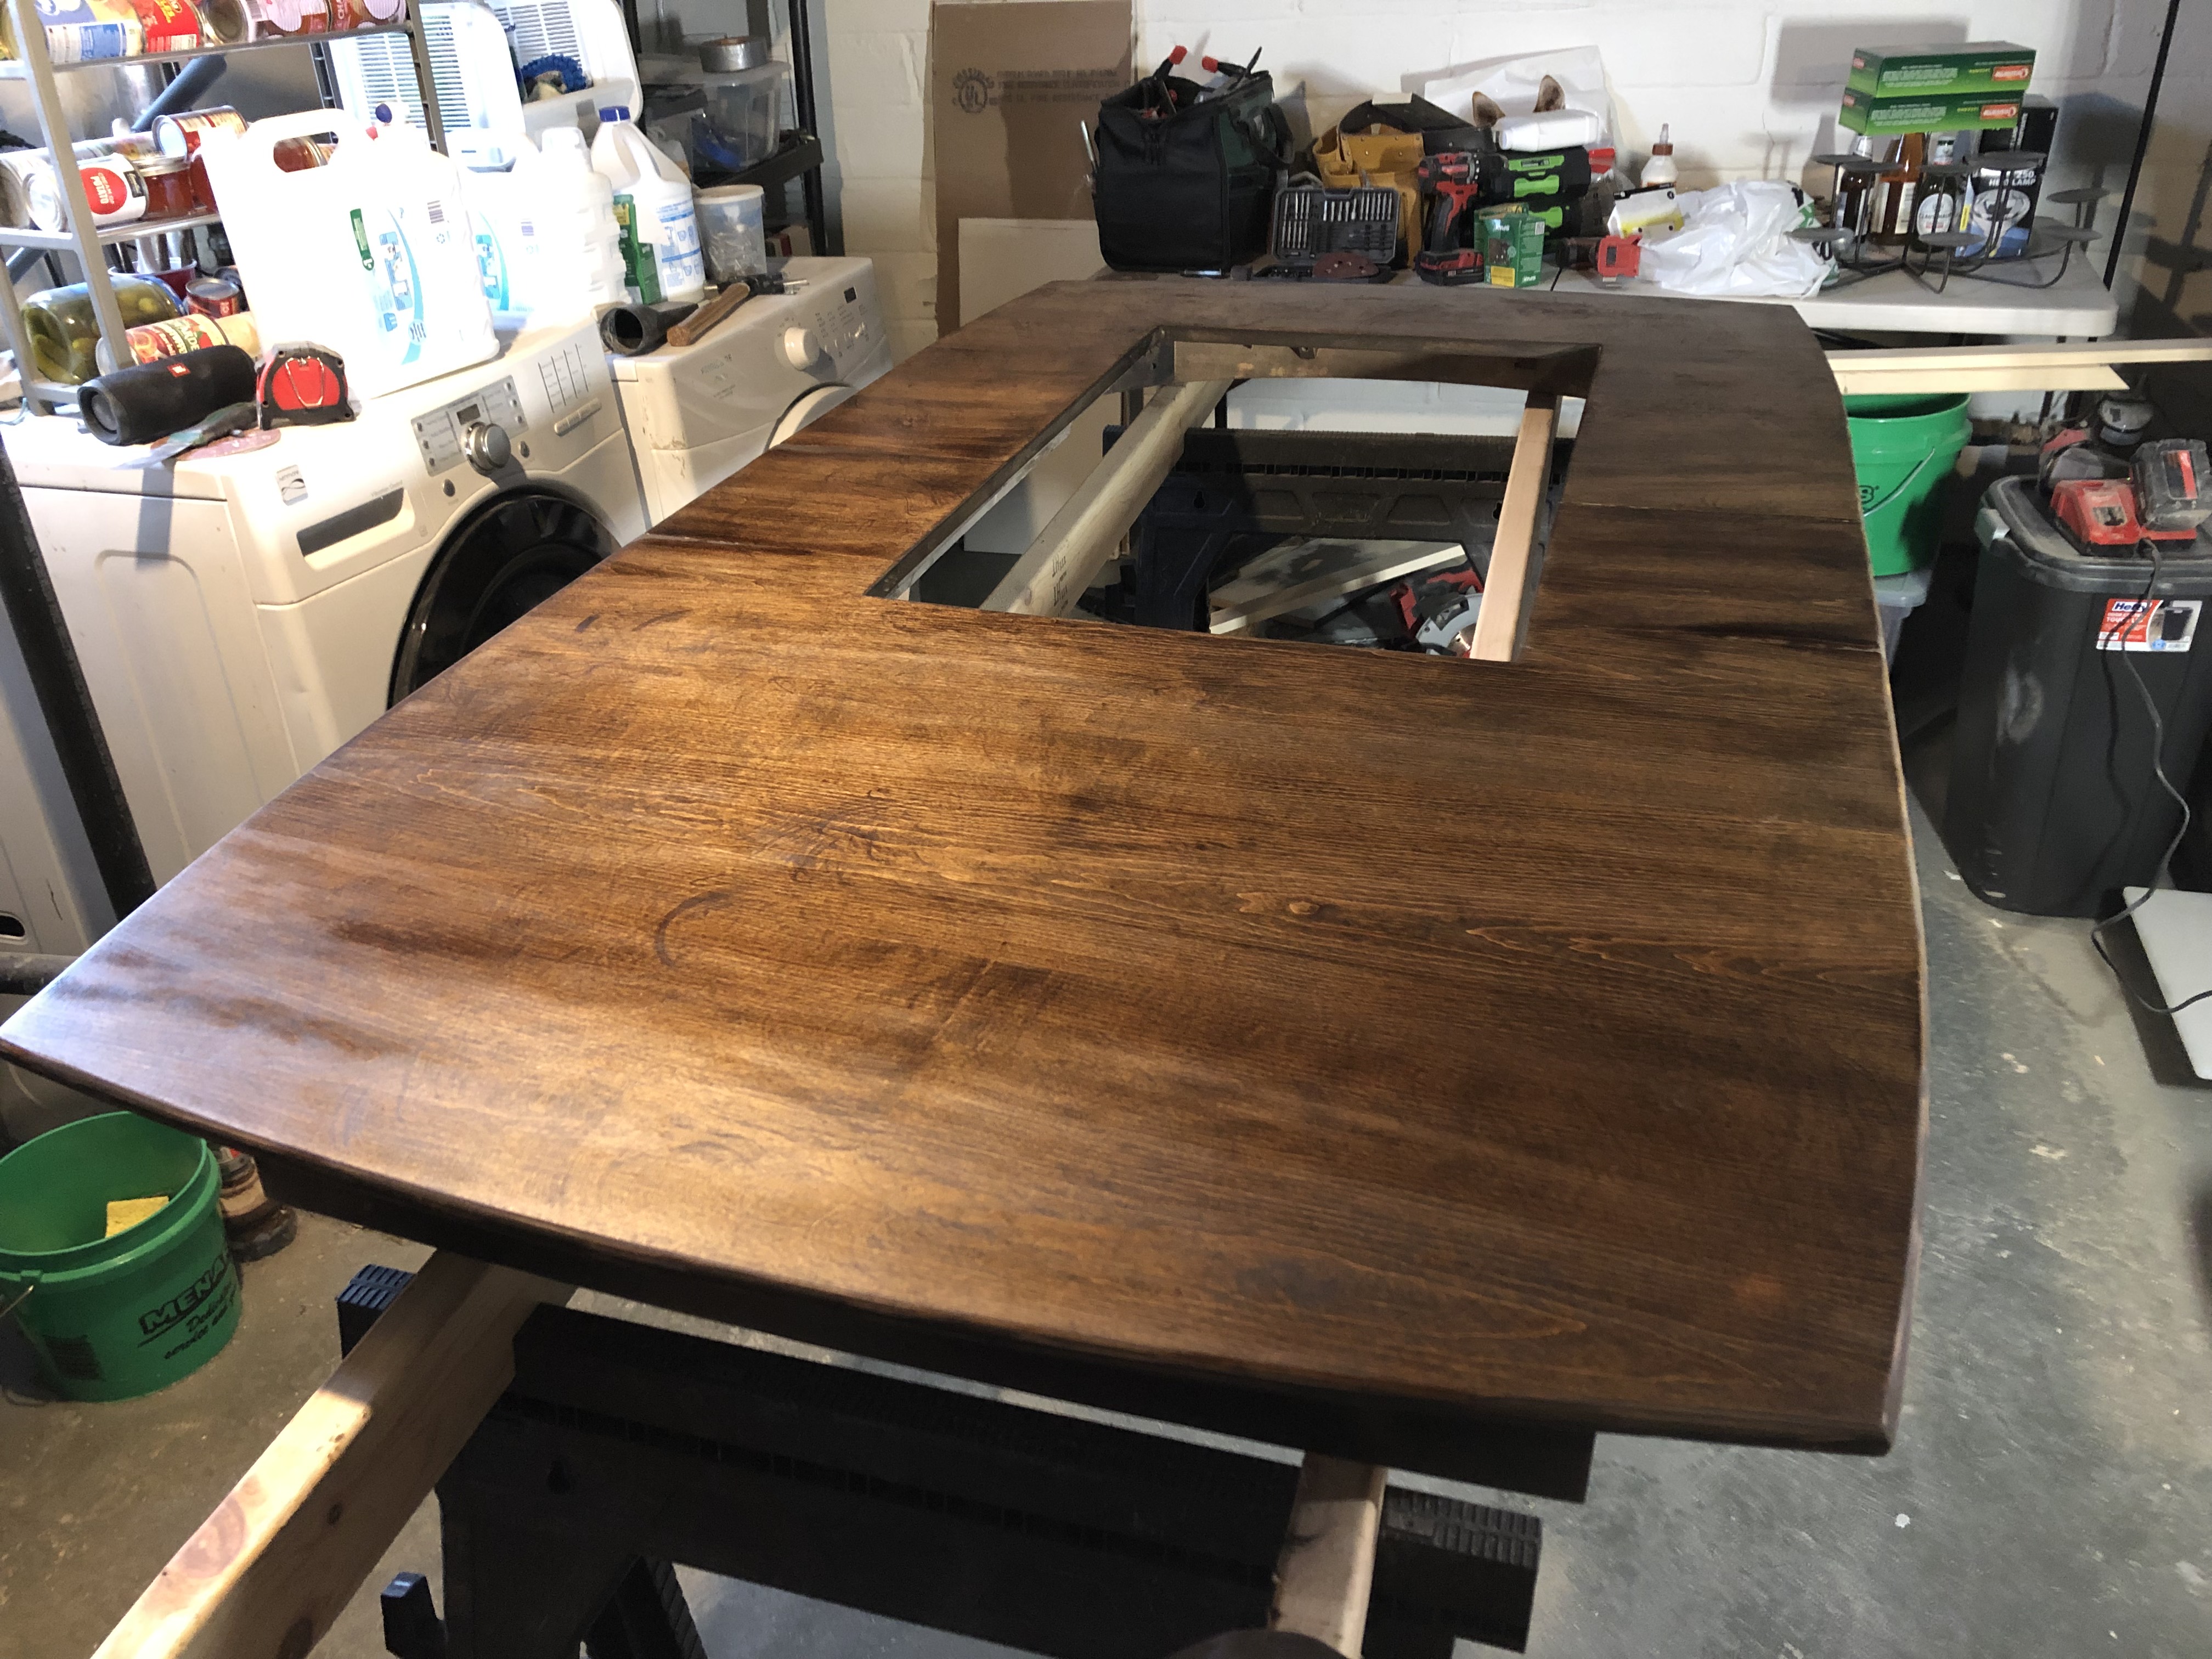
Laying the TV flat on the table meant it sat elevated, which made for an awkward eye level. I needed a table with a TV flush in the center. I knew I didn’t want to build a whole new table from scratch, so I opted to buy an old dining table and convert it into a gaming table by finishing it and cutting a slot in the middle for the TV.
The concept came from this video.
I purchased the dining table for $50 off Nextdoor. I joined the table and leaf together to form a solid top. Then I measured my TV and cut a slot in the center of the table. Next came sanding off the old varnish and stain to get to the raw wood. I used 60, 120, and 220 grit sandpaper depending on how much material I needed to remove. After exposing the raw wood, I used a tack cloth to remove dust and debris. Then I stained it with Minwax Dark Walnut and applied polyurethane—three coats, with light sanding between layers. After the final coat dried, I used a piece of brown paper bag1 to knock down any bumps and then buffed it with an ultra-fine polishing pad to get it smooth and shiny.
All the building supplies cost about $100. This includes the lumber (2×1x3, 2×1x2), a new can of stain and polyurethane, a jug of mineral spirits, screws, sandpaper, and the polishing pad.
I spent more overall, but there were quite a few materials I didn’t end up using. So $100 is the best estimate for everything I did use—maybe even a little less. I’d have to dig through receipts for an exact number.
$50 for the table + $100 for supplies = $150
This doesn’t include any power tools or equipment you might need.
Tools I used:
- Random orbital sander, with paper in grits of 60, 120, 220
- Circular saw
- Handsaw (to clean up cuts and corners)
- Bessey clamps
- Drill with drill bits for pre hole
- Impact driver
- Shop vac
- Tack cloth
- Ultra fine polishing pad
- Kreg pocket hole jig
- Minwax dark walnut
- Varathane oil polyurethane clear gloss
- Mineral spirit for cleaning brushes
- Bristle/China brush and foam brush
- General construction screws #8 1-1/2” and also #8 2”
- And of course the trusty speed square and tape measure!
This is the result:
-
Join table and leaf together:
-
Sand, stain, polyurethane:
-
Finish!:
Footnotes
-
Works like very very fine sandpaper ↩